iHealthHome
Quick Guide for Scheduling
CREATE SCHEDULES
NAVIGATE TO “SCHEDULES” ON THE VERY TOP MENU
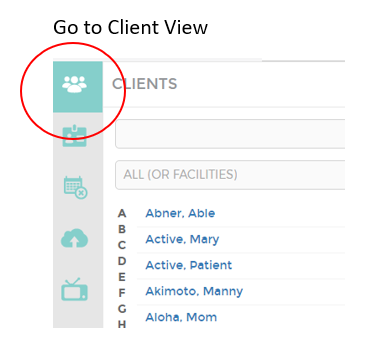
Go to Client View
ENTER A SCHEDULE FOR A CLIENT:
Go to Client View and select a Client
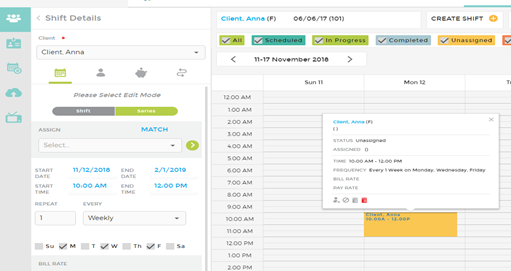
“Create Shift” on top menu
Select Series or Single Shift Option
- Creating series
- Select Caregiver
- Enter Start Date and End Date
- Enter Start time and End Time
- Select Recurrence
- Every Day
- Weekly – select days of the week
- Select Bill Rate
- Select Pay Rate
- Hit Save
- A shift will show up on the calendar greyed out as “unpublished”
- Unpublished means – it’s a draft
- Create a single shift
- “Create Shift”
- Select Client
- Select “Shift”
- Select Caregiver
- Select Date and Time
- Select Bill Rate
- Select Pay Rate
- Hit Save
- Shift should appear on calendar as “unpublished”
EDITING UNPUBLISHED SHIFTS:
Click TWICE on the shift you would like to change
If the shift is in a series, but only one shift is to be changed; change the Edit Mode to “Shift”
- This will remove this one shift from the series as it will now be different
- Make edits – date, time, caregiver, rates, etc.
- Hit Save
- Confirm Save
PUBLISH SHFTS:
In Left Column – go to Publish View (cloud icon)

Select the shifts you would like to publish
Click “Publish Selected” button
Publishing a shift will now make it visible to caregivers on CG2Go as well as Viewable on the Client Schedule - and viewable to care managers and families on CareManager2Go
Double booking – if there is a double booked shift, you will see two red boxes as a flagging icon before you publish.

An unassigned shift will show the “unassigned” icon before you publish

You can also publish a shift by clicking the unpublished shift ONCE and the shift summary box will pop up and the publish icon will appear in the left corner. Using the pop up box will only publish the single shift not the entire series. Use the Publish View to publish an entire series.
CHANGING A CAREGIVER AFTER PUBLISHING:
Click ONCE on the shift that is to be changed
A shift summary box will pop up
On the left corner, select action from editing options – remove caregiver, cancel shift, delete shift, or delete series
Confirm action
CHANGING A SHIFT AFTER PUBLISHING:
Click TWICE to go into Edit Mode on the shift details at the left
To change only that shift – click “SHIFT” in edit mode
To change the Series – click “SERIES” in edit mode
Make the changes and hit SAVE
NOTE: Once you have SAVED, to make another change; you must Double Click on the shift again
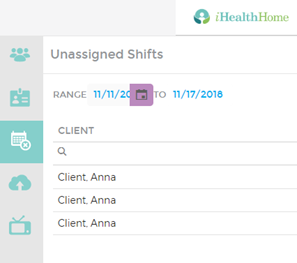
VIEW ALL UNASSIGNED SHIFTS:
Click the “unassigned shifts” icon on the left navigation bar to view all unassigned shifts.
Go back to the schedule and Click TWICE on the shift that is goldenrod color to open the Edit Mode on the left. Assign a caregiver or run the MATCH to find a caregiver that is available for the shift.
VIEWS
There are multiple views of schedules to help make it easy for your to manage scheduling
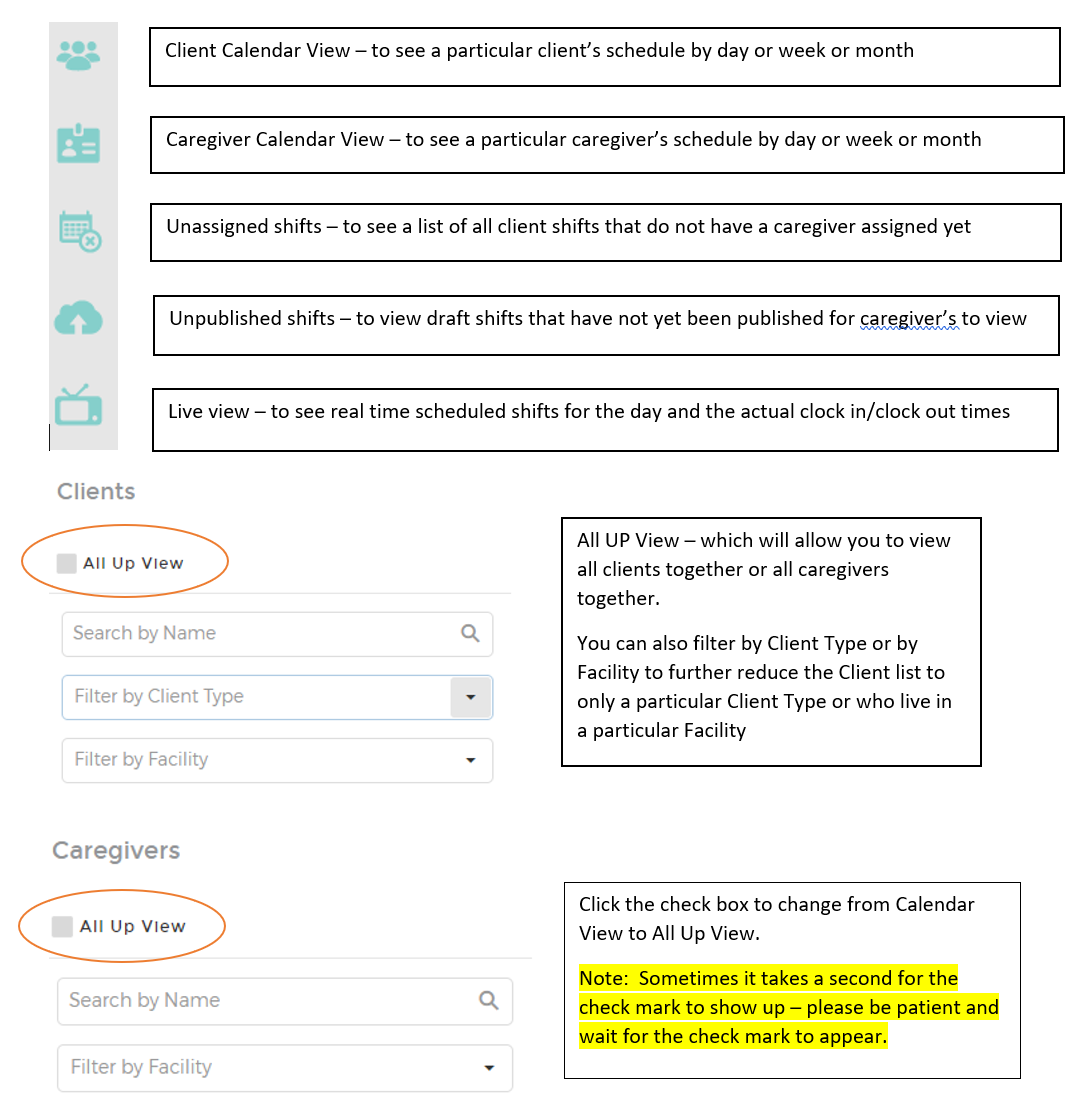
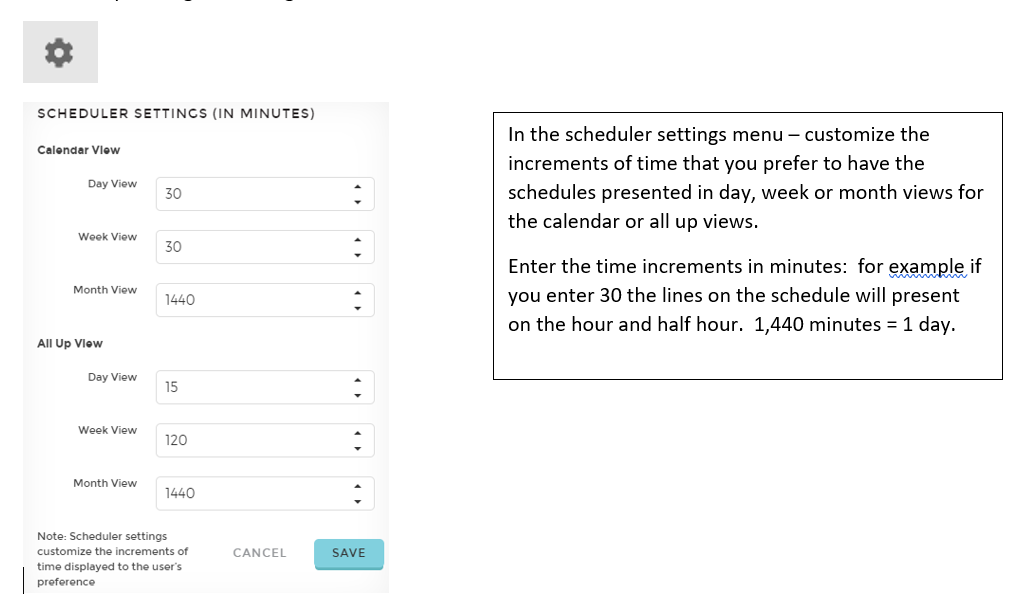
ALL UP VIEW
Day, Week, Month or Today – In the right corner, select the timeline for the desired view
Customize Time Increments in Views – customize the time increments for the selected timeline by clicking the setting icon in the bottom left corner.
Scroll: Place your cursor at the bottom of the screen for a scroll bar to appear to enable you to scroll left and right to see more of the timeline.
Unassigned Shifts – In the Caregiver All Up View, if there are any client shifts for which there is no assigned caregiver yet – they appear at the top of the view under the first caregiver called “Unassigned Caregiver”. You can easily assign shifts to caregivers by dragging an unassigned shift box down to a caregiver that has an open slot available. (See drag and drop below).
Drag and Drop – Right click, hold and drag shift boxes to change the time of a shift or change which caregiver is assigned to the shift. The Edit box on the left panel will reflect the NEW time or caregiver. The shift box itself will retain the OLD time and caregiver for your reference.
Click  to make the change. Since the shift has been changed, it will unpublish and you must re-publish it to confirm. Click to restore the shift box back to it’s original settings and place in the all up view.
FACILITY SCHEDULING
WHAT IS FACILITY SCHEDULING?:
Allows your caregiver to Clock In and Clock Out of a shift at a facility for payroll purposes,
But also allow caregivers to Clock In and Clock Out of individual clients for billing purposes.
SETTING UP A FACILITY:
Go to Admin / Client Coordination Tab
Goto Client Resources Tab
Businesses
Click the + to Add
Type in the Name of the Facility under “Business Name”
Select “Facility” under “Business Type”
ASSIGN A CLIENT TO A FACILITY:
Select Client, got to dashboard
Goto Client Admin form
Subform: Client Details – select a facility in the Facility box
SCHEDULE A CAREGIVER TO A CLIENT AT A FACILITY:
Goto Schedules
Go to Client view
Select pull down box and choose the Facility – all clients assigned to that facility will be displayed
Select Client
Schedule Clients as Usual – see Scheduling quick guide steps
 Click the Printer icon at the top of the screen to print Schedules in a tabular list format.
Select Schedule Type – Client or Caregiver
Subject: Select the name of the Client or Caregiver from the pull down list
Click the boxes for the detailed items to be included in the print out
Select the Start Date and End Date
Click Print 
CAREGIVERS
To enable a Person to be a Caregiver on a Schedule – be sure that they are in Active status in their Profile.
Click Profiles on the top navigation bar.
Select the Person you are looking for and click on their name which will open their Profile.
Click on the “Account & Status” tab and scroll down to the “Status” box and be sure it is set to “Active”
In the “Preferred Communication Method for Notifications” check off the desired notification mode for scheduling notifications – email or text or both. Whenever a shift is “published” the caregiver will receive a notification of the shift via the desired mode.
0 Comments