Assigning Medications to a Client
You can easily add and update your Client’s medications directly from their Dashboard
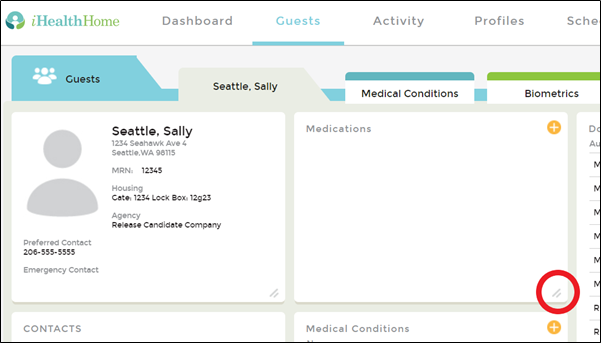
- Log into your Company and open the Client file that you would like to work on. From the Client Dashboard click the two grey lines in the bottom corner of the Medications widget.
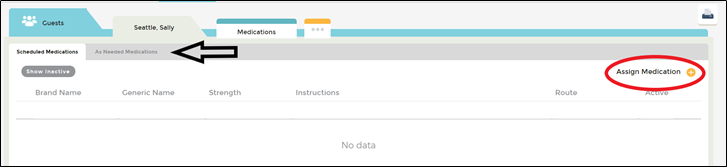
- Notice on this screen you have 2 tabs available, one for Scheduled Medications and one for As Needed Medications. The steps to add are the same for both, there is a check box for “Is PRN” that can be marked if you want the medication on the As Needed list. You do not need to go into the As Needed tab specifically to add that medication. Click the yellow “+” sign in the top right corner to assign a new medication.
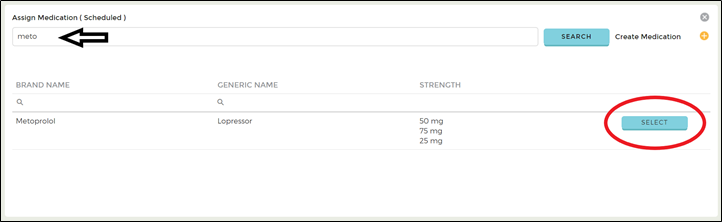
- Start by searching in your Company’s library of medications. In the box, type in all or part of a name and then click the Search button. The grid will display all medications that fit your search. If you see the medication you need, click the Select button. If you do not see the medication it will need to be added to your Company’s medication library. Scroll down and see “How to add Medications to the Company Library”
- From here you will add all the details about this medication for your Client. Remember only data fields with red dots are required in order to save this medication to your Client’s file. Please note the check box for “Is PRN?” in the middle of the screen defaults to “No” here. Check the “Yes” circle if you’d like the medication put on the As Needed list.
For this example our medication will not be PRN.
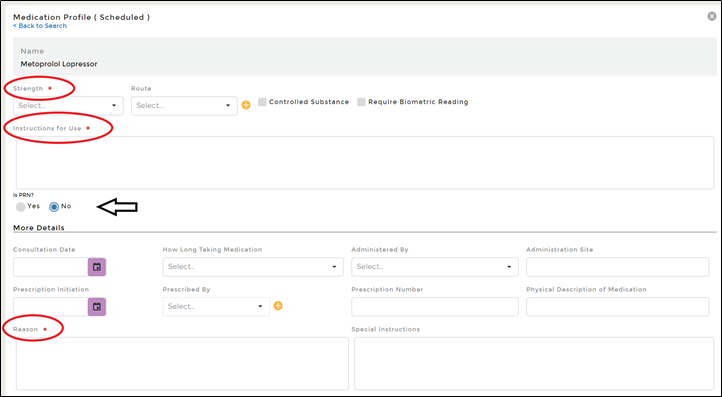
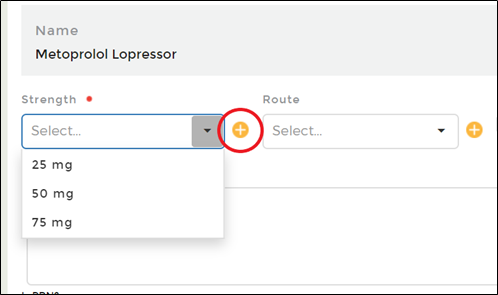
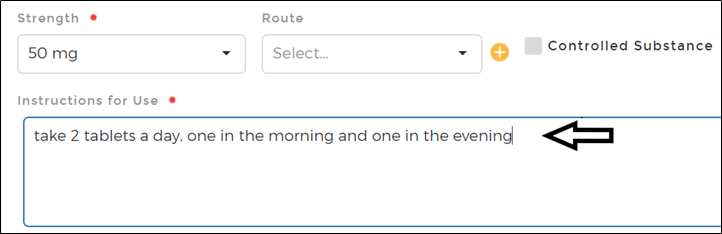
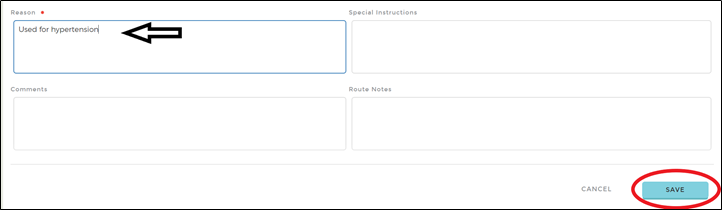
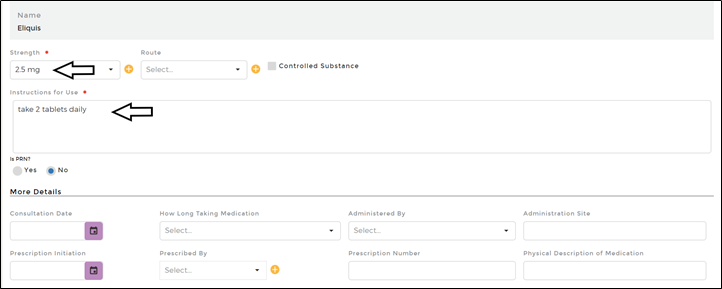
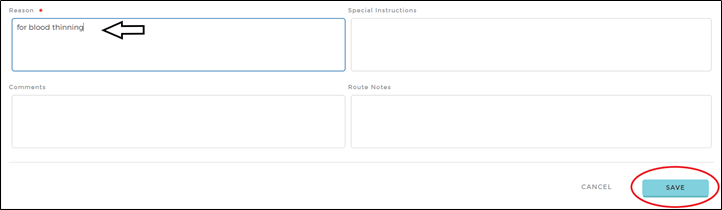
- Click on the dropdown to select the desired strength. If the strength that you need for this medication is not in the dropdown, simply use the “+” icon to add the strength you need and save it to the library. It will be available now and for future use. Next add the Instructions for Use and the Reason. Then click Save.
- Note you do have the option to turn off the requirement for the Reason field. Please contact Customer Support if you would like that done.
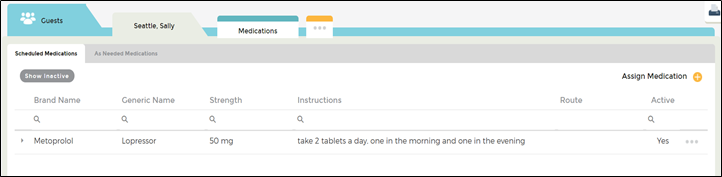
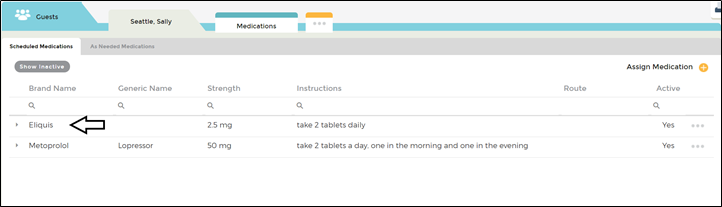
- The medication has been assigned to the Clients file. Repeat these steps to add additional items.
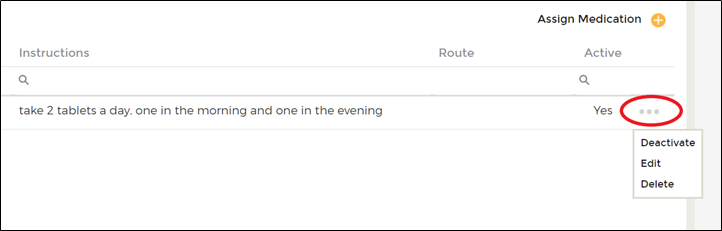
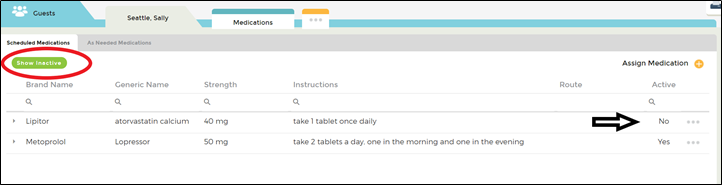
- Should you need to edit the medication, make “inactive” or delete it from the Client’s file, click the “…” to the far right of the medication that needs to be edited. Select “Deactivate” and this will keep the medication in your clients file for later reference; “Edit” to make any needed updates or “Delete” to completely remove it from your Clients file. Medications that are deactivated will no longer show on the list unless you click the “Show Inactive” button.
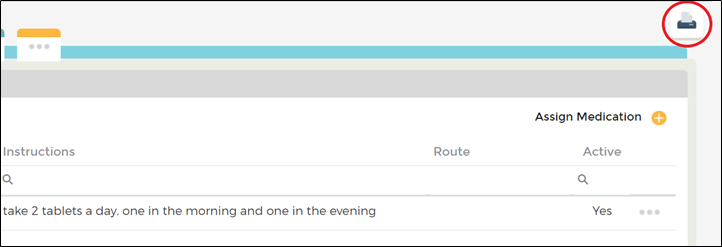
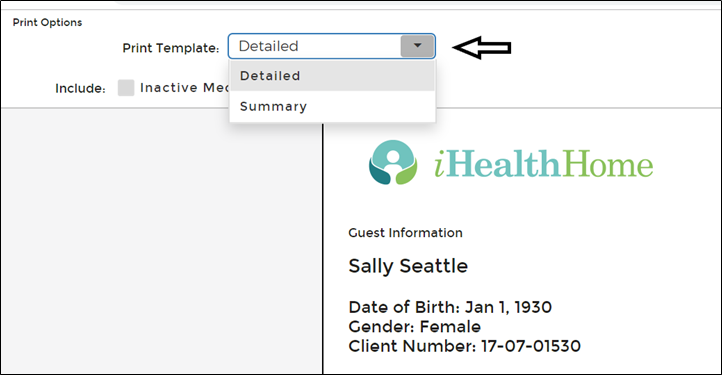
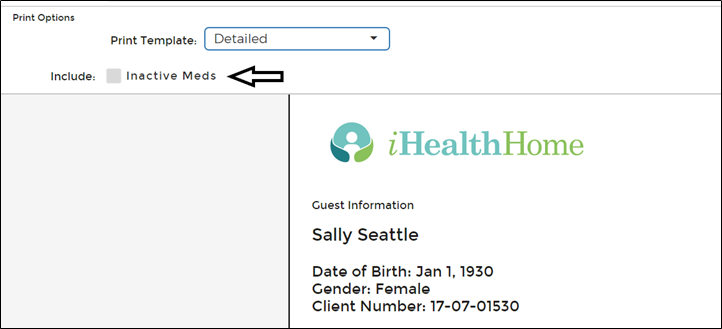
- You can print the medication list from this screen using the printer icon in the top right corner. There are various options for printing this list including a Detailed or Summary View that you can select from the drop down as well as choose to include your Inactive meds by checking the box.
“How to add Medications to the Company Library”
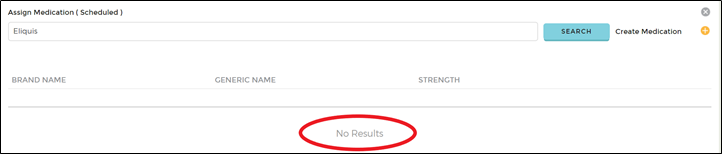
- If you type in a medication, click Search and it is not in the Company Library you will see “No Results” in the box. You may be able to add it to the library if your Company has provided you the security permission to do so. If you think you should have this access and do not, please contact your Company Administrator.
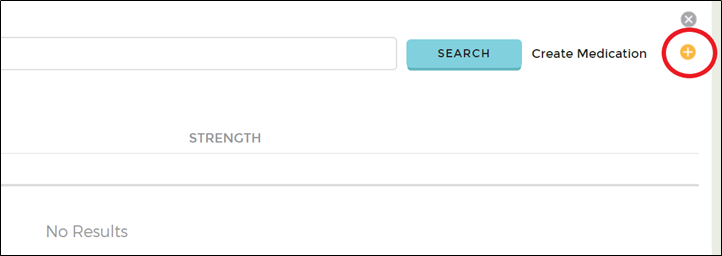
- Click the yellow “+” icon in the top right corner of the screen. In the box you have the option to add either the Brand or The Generic Name. You must also enter at least one strength. Type in a number for strength and then select a concentration from the dropdown – if you do not see the concentration that you need please see the guide for “Adding and Editing Medication Concentrations” Use the yellow “+” icon to add additional strengths, you can add as many as you need. Click Save when you are done.
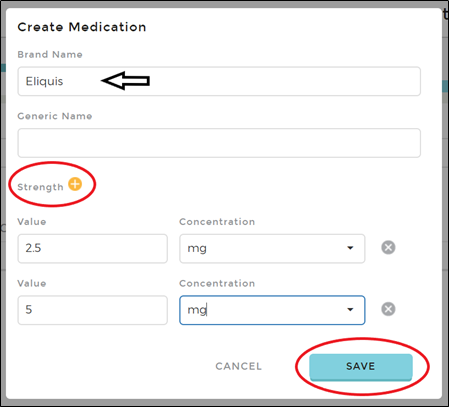
- When you click Save the medication is now ready to be assigned, with details, to your Client. Fill in the required fields for Strength, Instructions for Use and Reason. Note you do have the option to turn off the requirement for the Reason field. Please contact Customer Support if you would like that done.
- Fill in any additional information you would like to capture and click Save at the bottom
- Now the medication has been assigned to your Client’s file.
0 Comments